Showing posts with label beaded ornaments. Show all posts

Tuesday, December 8, 2015

2015 Ornament Exchange - the main exchanges

This year's major Exchange Ornaments have been sent out.  These are the major annual exchanges which I have to make multiple ornaments.  I try to make the same ornament for each member of the assigned group instead of separate ornament designs for each individual.

I was a member of two different groups who held handmade ornament exchange this year.  The first group, I needed to make a total of eight (8) ornaments, four in each group and I asked for two groups. Most (maybe missing one) have received their ornament so I feel better about posting a photo of the ornament at this time. I had a mother in one group and her daughter in the other group, who both live together, so I made the second ornament so they wouldn't have two ornaments the same on the tree.

Main ornament


Variant ornament

Many years ago, I had gone to the After Christmas sales looking at the various ornaments which were greatly discounted.  I happened upon several containers of miniature glass onion globe ornaments, three colors with eight ornaments per color in each container.  I picked up all they had (seven containers: 3 of white, red & green ornaments and 4 of bronze, gold & copper ornaments).  I had forgotten about them and discovered them again last year.  Still have many of them available for future ornaments, and will most likely use them for many personal gifts for this year.  The white is actually close to an antique pearly white which matched the pearl drops and pearl beads very close in color.  The smaller Delica beads I use on the arcs/arms were a close match as well.  If I decide to do these as my major design I can easily change the color the the Delica beads to match friend's individual likes such as one friend likes orange so I will do an orange and pearl and a friend's daughters like pink and purple while his will be deep red and his wife's will be classical pearl white.

The other exchange I was a member of this year, I had to make seven (7) identical ornaments, then send them to the coordinator who will redistribute them to the participants.  I like this concept as only the people who send in ornaments will receive ornaments in return and they come all at the same time.  For this exchange I created a beaded icicle with pearls, rhinestone rondells and bi-cones.  I have seen a similar ornament on Pinterest which I liked.  I changed a few things, deleting an additional embellishment of 'caging' the top pearl which additional pearls and bi-cones and adding additional spacer beads separating the individual elements.

Tuesday, March 17, 2015

Getting into the Christmas Spirit (or at least trying to)

It is getting closer to Christmas and I am getting in the mood to start making ornaments.  Been looking at various pieces of jewelry on Pinterest.  As stated before, many of my ornament ideas come from pendants, earrings and other pieces of jewelry, especially if I am designing ornaments for a miniature tree.  Sometimes, the piece can be enlarged to “normal” ornament size just by increasing the size of the beads, other times not and the enlarged ornament will need to be re-worked to include the additional use of beads.  With an increase in the number of beads, also comes the increase in weight from the additional supplies.

Thinking about doing more of the wooden spool ornaments from last year, already have eight designs for people who are fans of the University of Alabama, and my godson will be ‘graduated’ from Mickey to the Teenage Mutant Ninja Turtles which have been designed to make four different ornaments.

Over the years several people have received miniature trees from me and I have about four (4) 2-foot trees in storage that I thought about making with the possibility of selling.  Usually each tree has 80 to 130 mini lights on them mixing both battery-powered as well as outlet, usually will use white lights.  I will put about 100 miniature hand-made ornaments, 25 different styles with four ornaments placed around the tree.  Most of the ornaments will be between 0.5 inch and 2 inches in height so that the ornaments are in scale with the tree.  The first tree I made 10 years ago, had over 40 pairs of earrings mixed in with the miniature ornaments.  Since then, I have been on the look-out for earring designs which I can make as miniature ornaments.

Have many old designs of miniatures from past years which I already have extra ornaments hanging up and have ‘discovered’ several more that can easily be turned into miniature ornaments.  So the new trees would have enough variation of ornaments so each tree won’t look a-like.   I try to make four of each design so that one can be placed on each quarter of the tree with two of them placed on the top half and two on the bottom half.

The only thing on the tree I usually don’t make is the tree topper, I will purchase a pre-made miniature topper but will add elements to it.

Thursday, November 13, 2014

Exchange ornaments

This year I had three (3) different handmade ornament exchanges from two different Yahoo groups.  I have been involved in ornament exchanges for almost 20 years.

I had two exchanges which were from the Yearly Ornament Exchange group.  Those that are signed-up are assigned to groups of (usually) four others and everyone makes an ornament for each person.  And if everything works out, you will receive four handmade ornaments.  No style or medium is set so you can (and usually) get four different ornaments.  In past years, I have received ornaments made from beads, polymer clay, wire, cross-stitch, plastic canvas, paper, cloth, wood, and puzzle pieces.  These have been both religious and secular in nature.  I will do the same ornament for each exchange partner unless they are duplicated in both groups, then I will make another ornament, usually same designed but a different color or different focal element.

The third exchange group is from the Christmas All Year group.  This group you sign-up and the co-ordinator instructions have many ornaments you need to make.  One rule is that the ornaments which you make all have to be the same. So that when the ornaments are re-packaged, everyone in the exchange will receive the same ornament from you.  This the magic number was eight (8).  Trying a new ornament design for this group and hope everyone likes it.

Will be posting photos of both ornaments I send out after Thanksgiving, along with instructional photos of the new design and variations on the theme.

On the personal gift/ornaments front,   I usually joke with people that I have several lists I make at Christmas, an “A” list, a “B” list and a “C” list.  The C-list gets a card, the B-list I will buy something for and the “A”-list will get an ornament or a set of ornaments. 

The lists are not set in stone as this year I found a ceramic Krampus head I bought for a friend, and my soon-to-be step daughter and husband, I have Egyptian glass ornaments which will go with the set I gave them last year.  They married last year and I gave them a group of four blown ornaments as a way to start their own ornaments.  They had a baby in February of this year so I will be making her a little commemorative ornament with her name and birthday date on it.  I am planning on making 2 of these, one for the tree and the other sealed to be given to her when she moves out on her own, so she will have her own set of personal Christmas ornaments.

I have many ornaments in various stages of creation.  Many people will be receiving personal ornaments this year.  I have one person who loves the Minion characters from the “Despicable Me” movies, another enjoys “Doctor Who”, several who pull for Alabama, UNC or NC State, and another who loves Mickey Mouse (okay he is only 2 years old).  I have either found pre-printed fabric and scrap-booking paper in these themes, but I always have had to create copy to use.  Luckily, I have a very nice commercial laser printer available to me through work, as well as the programmes (Adobe Creative Suite Photoshop, Illustrator and InDesign) and knowledge to make my own compositions.  Sometime my job does come n handy outside of work.  So Deb will get four Minion theme ornaments, Matt will get two Doctor Who theme ornaments.  Chuck and Little Jimmy will received four Alabama ornaments each, Ayden - two (maybe four) Mickey Mouse.  Robert a new set of UNC ornaments, Roger and (another little) Jimmy will receive NC State ornaments.  Others like a specific color, I’ve got an Orange person, a Pink person, a Purple person, and a Dark Blue person, another person likes the color combination of White, Black and Gold.

Monday, July 21, 2014

The latest ornament plus visions of future ornaments

Have started on the ornaments for this year's exchanges.  Making the teardrop dangles currently, then will start the actual construction of the individual ornaments.  Will make at least 12 of these, then I'll start on the individual ornaments.  Have a few 'special' ornaments to make such as an Irish flag version; plus several rainbow; a black seed bead, pearl accent & teardrops, and gold version; and several non-beaded ornaments.


I used this ornament as the 2nd Quarter Exchange and liked it so much that for the Annual Ornament Exchanges I am making extra.  It is different enough from last year's ornament design that I thought about using it for many of the people I give to at Christmas. 

Tuesday, May 27, 2014

It has been awhile, but I have been busy: ICICLES and dangles


One of the Ornament Exchanges for this quarter was "Recycled".  Here are images of my final ornaments.  Where I work we have expanded stainless steel grating which we use as protective covers for the Water Recirculators we make.  There are pieces of scrap which I have de-burred and fashioned into various lengths.  I bent the top of each to form a hanging hook.

The base coating is another recycled product from work.  Another part of the company I work for in cutting protective lens from plastic sheeting, Polycarbonate and PET-G.  When cut on the saw, the resulting sawdust is a nice snowy white.  Using E6000 epoxy, I glued the plastics sawdust to both sides of the metal, allowed to dry and then using spray adhesive I applied large flake glitter, regular glitter and then micro-fine glitter to the surface.

This is a piece of the mesh.  I had one of the mechanist to shear the initial pieces into long wavy strips.  I then used the grinding stone to take any sharped metal off.


I had other ornaments I needed to make for other commitments.  Each year, I will do a "Pay It Forward" campaign on Facebook.  People sign up and commit to also "pay it forward" in that sometime in the year, you will make something hand-made and send to the person along with a handwritten note.  This year, the people will receive miniature Christmas ornaments made from glass teardrops, rhinestone rondelles, bead caps, metal beads, wire and Delica beads.  I had 10 different colors of the rondelles: Clear AB, Red, Lime Green, Emerald Green, Aqua Blue, Medium Blue, Sapphire Blue, Purple, Root Beer and Smoke Topaz.


There was another 'contest' on my Facebook page to identify the person dressed in the Santa outfit.  The image came from the up coming movie "I Am Santa Claus" which stars WWE wrestler Mick Foley.  The person who correctly identified him will be receiving the four dangles pictured below.


Monday, April 28, 2014

Been a while

It has been some time since I last posted.  During the time away, I took a class on How to run a small arts/crafts business through one of the local colleges on-line.  I have made several miniature ornaments (but haven't gotten any of them photographed).  Hoping to get back into the rhythm this week now the class is almost over.


Thinking of one of these as this year's Exchange Ornament.  Have 24 of each color (plus 4 other colors).  The finial onion shaped ornaments are blown-glass.  I picked them up seven or eight years ago in an After Christmas mark down sale.  I may decide to assign the white to one group and the red to the other group and that way if I have any duplicates between the group, I won't have to quickly make any additional ornaments.


I can also make extra to have in my car in case I get caught without a needed gift, I can raid the gift/ornament stash.  Luckily, I had several in my trunk last year, as I had been invited to Christmas dinner (no one told me until an hour before hand) and needed 2 gifts.

Have been already making my lists for ornaments.  Have one person who will receive a set of Teenage Mutant Ninja Turtle ornaments, another who I will make a set of Minion ornaments, have several Alabama, Georgia, Duke and UNC (Carolina) ornaments which need to be made.

Thursday, March 6, 2014

Ornaments 5 through 12, plus 4 more of the same design

Had a case of 'ho-hums', was unmotivated and didn't have any creative spirit.  I am fairly sure it was based on the fact to I had a co-worker staying with me.  Was supposed to have been for one week, turned into 3 weeks and each night when we got home I would go to my bedroom and read.  Got him to move on and that seems to have re-started things flowing again.  On the weekend of February 22nd-23rd, I started a Ornament Suite of seven ornaments.  One each of Red, Orange, Yellow, Green, Blue, Purple and an ornament with a spoke in each color.  Finished the seven on March 1st, and on the next day started on colors, Gold, Silver, Black and White.


Wednesday, February 5, 2014

4/52 ornament

As alluded to in previous post, I did a white and gold version (two actually) of the red onion with pearls and white onion with pearls and opaque black seed beads.  I have several more colors of the miniature ornaments plus a couple dozen of miniature stylized Christmas tree ornaments along with frosted pine cones.


Monday, February 3, 2014

Ornaments #2 and #3 for 2014

I had the 'spike' ornaments for several years.  I have them in red, green, blue and purple.  Wanted to carry the swag motif from the miniature ornaments to the entire ornament.


This is the ornament that I am giving an internet friend for his birthday, February 5th.  It will be going into the post this afternoon.  He likes the black/white/gold color combination and most (if not all) ornaments he has received from me are in this combo.


Currently working on the above but using white opal instead of opaque black.  Have one finished and half way through a second.  The white will be for the 1st Quarter ornament exchange at ChristmasOnramentCrafters under the YAHOO! groups.

Saturday, January 11, 2014

Other ornaments from Christmas 2013

Most of the Christmas gifts I give are handmade beaded ornaments done in various colors of beads.  Occasionally I will more than one, especially if the gift is going to a couple or family.  The following are photos of ornaments which were given during the 2013 Christmas season.

These were not only the Exchange ornaments I used but were also a set given to my younger sister in NC.


The red ones were also given to my younger sister.


Another set went to a co-worker and his family.  The Dark Red (not shown) to the father as he likes Alabama, the wife received the White, oldest daughter Purple and youngest daughter Pink.

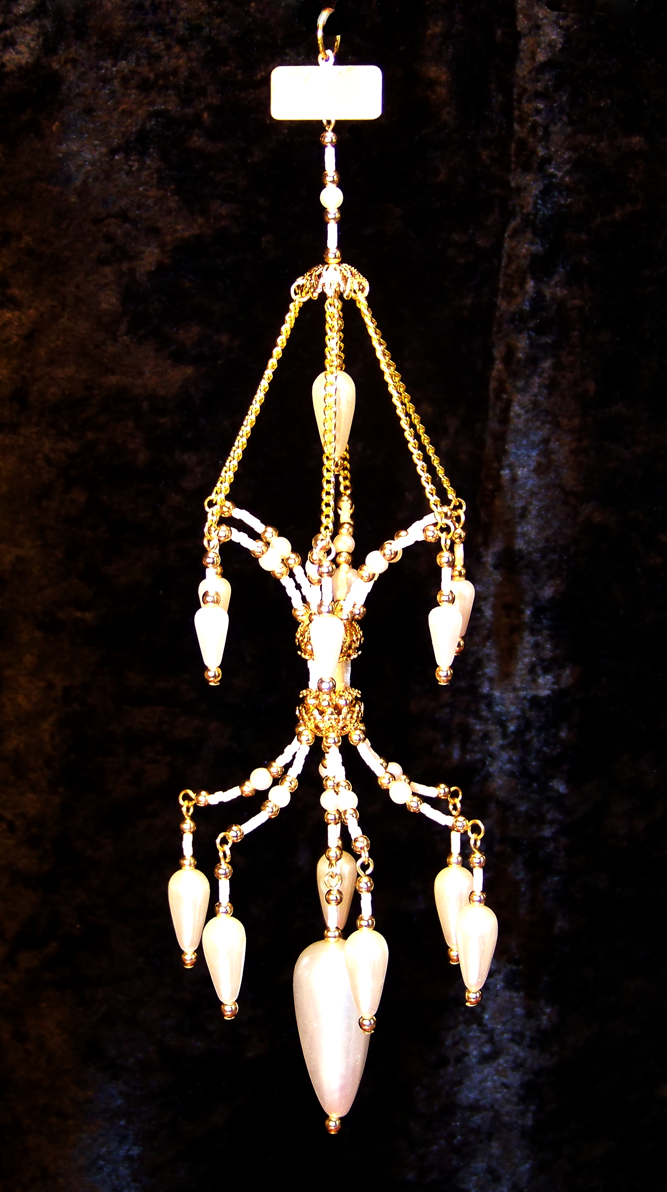
Most of the other ornaments given followed the designs below but in various colors.  The Suspended Chandelier (left) also was done in White, Blue, Orange, Rainbow, Light Blue and Ivory.  The regular Chandelier (right) was done in White, Light Blue, Rainbow.


I also did a few variations on the Exchange ornaments in Blue with Silver beads.

Saturday, January 4, 2014

First Ornament of 2014

When I was in NC for Christmas, I found 14 dozen miniature ornaments which I had purchased several years ago.  There are 6 colors of the onion-shaped glass ornaments.  Using the red ornament I have just finished this ornament.  The ornament is 8.5" tall and 2.75" across.  Other colors are bronze, gold, pale gold, olivine green and snowy white.


Thought about using red glass beads instead of the pearls, but I don't have corresponding glass beads for the other colors.  By using the pearls, I can give several as a gift and they will look as if they are a set.  The small seed beads I use will match the onion ornament and I've incorporated them on the dangles

Friday, December 20, 2013

Another set of 2013 Christmas gifts - II

These two went to a person who like the elegance of the color combination of black, gold and white .  Each year he receives at least one ornament in these colors either for Christmas or his birthday.


Thursday, December 19, 2013

Another set of 2013 Christmas gifts

This family consists of three: husband who is from Irish descent, his wife and their 5 month old son.  They received several of my ornaments over the past year and the son’s birth gift from me was 2 - 1.5 carat faceted rubies.


Friday, August 23, 2013

It's THAT time of year again.

Guess what time it is? It's FLUFFING TIME. Michael's have their miniature trees out and I have bought four (so far), that's right four miniature trees that I will be fluffing out and trimming to start lighting and decorating. Possibly five, I have to excavate the closet but I think I have one in there. I have lots of beads which will be turned into miniature ornaments over the next couple of weeks. Already have some new designs I want to try along with some of last year's designs still being used. Most likely one tree will be Rainbow, another tree to be white-clear-gold, another silver-clear-blue. 

Updated 2013.09.12:

Here are a few of the miniatures I have designed for this year's mini trees.


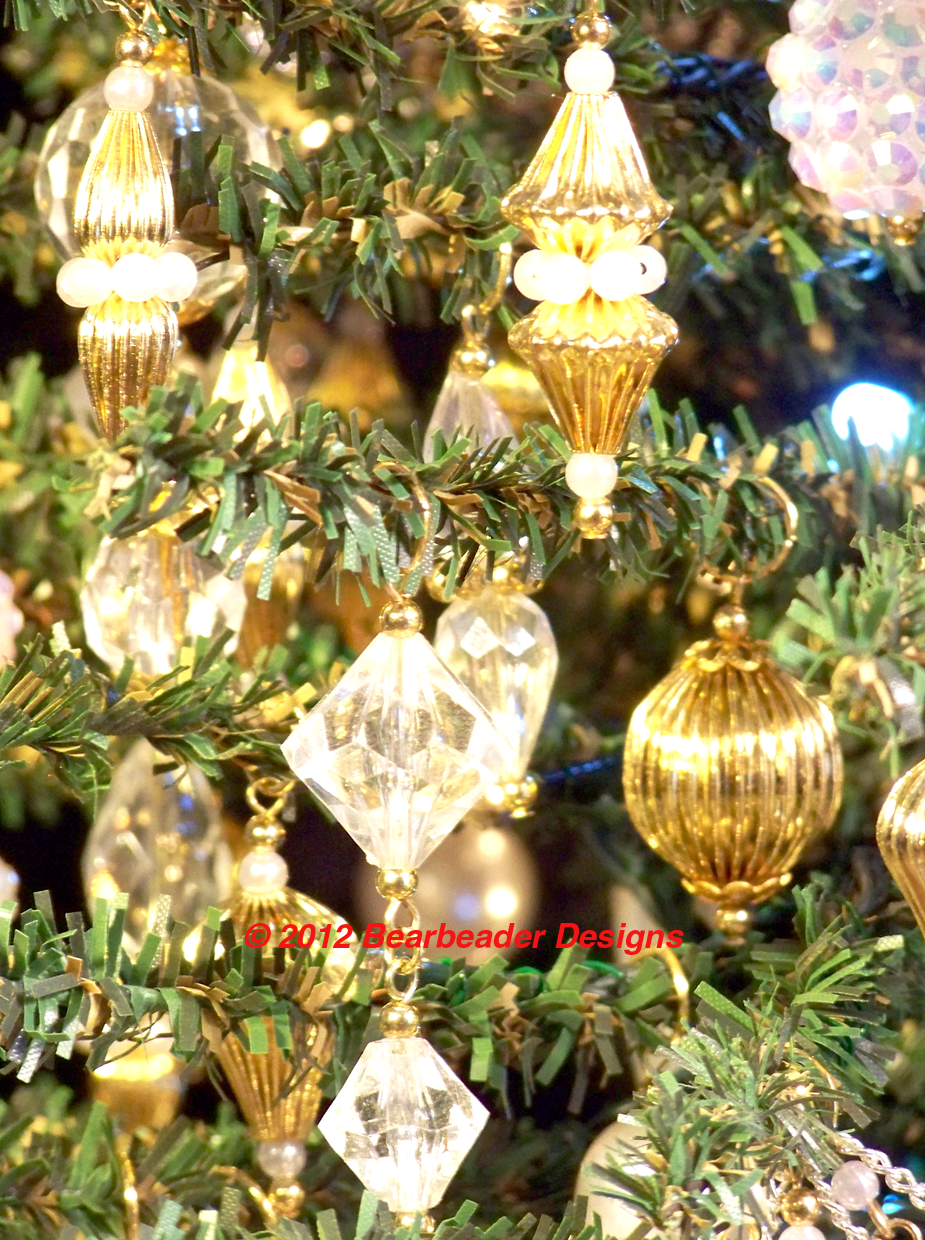
These are made from mesh beads with glass rondelles being used to reduce the size of the openings in the mesh beads.  To get additional ornaments from the designs, I added the dangle of a Clear AB teardrop.  Traditionally, I will have the teardrop with the tapered end pointing downward.

Thursday, June 13, 2013

Going further down the “Miniature Rabbit Hole”

Several weekends ago, I went to my favorite wholesale show for gem and jewelry.  I found several strands of beads which reminded me of some of the beads I used on the miniature trees I made in 2012.  If you are trying to make the tree “to scale”, beads make great ornaments.  Many of the beads I use are 6mm (1/4") to 20mm (5/8"), which if you are wanting the 2 foot tree to be scaled to an 8 foot tree, then these beads would appear to be 24mm (about 1") to 80mm (3-1/4").  Since I also add at least two additional 3mm beads to almost every miniature ornament, you can add an additional inch to the apparent scaled size.


While glass beads have an inner ‘glow’ or ‘life’ to them, they also have weight.  The finishes available to the glass beads are much more vibrant, reflex light and have a wider range.  For the most part, a glass bead and a plastic (sometimes known as acrylic) the same size, the glass will weight considerably more.  When you will be adding almost 200 ornaments, weight should come into consideration.


Some of the beads I use have larger holes.  Solutions to this can be as simple as using a bead cap and additional beads inside to fill the hole.  I have several beads which have made great ornaments but the hole was larger than 1mm.  I usually use a 3mm beads on the bottom and top of the ornaments and when you have a larger hole the bead will sit down on the 3mm, or even won’t even stop to notice and fall off the headpin.  With beads with 1-4 mm holes, on the headpin I will put the traditional 3mm bead, a bead cap, then put on several smaller beads which will slide inside the hole of the larger bead.  Using these extra beads take up some of the room in the hole, thereby stabilizing the bead.  If the beads are transparent, I have used clear silver lined Delicas®, silver 2.5mm beads, or clear silver line bugle beads.  If the beads are hollow like the corrugated metal beads, I use the soft plastic ear nuts at the top and bottom to act as stabilizers and help center the bead on the head pin.  I prefer using the ones that look like little hats as I can cut the excess off.


I went browsing through one of the local bead store at the beginning of June and the store had a “bargain bin” of beads that they were trying to clear out.  I knew I shouldn’t have browsed, but I did and ended up buying a few packets (13) of beads.  Almost everyone of these will be used in making miniature ornaments.  Some will be finished just by adding some chain, or maybe a linked gold bead if I can find a gold which matches.  The bead shop had more of these beads, and I will most likely be heading back soon to ‘clean them out’ of certain beads.  I have found over the years, that if you find a limited quantity, better to buy as many as you can afford, as you will find the next time someone has beat you to it and you will never find them again.  This has been learned from experience.
The black and white squares are ½”, ¼” and ⅛”, the entire block is 2" x 3".  Most likely the spikes or daggers will be used as icicles, attach a piece of chain and maybe a beaded link for the small spike.

The mesh beads will have a clear earnut inserted into each end and covered with a bead cap.  The last time the store also had several different sizes of the mesh beads available in different anodized colors: pink, light blue, dark blue, silver, red, bright green, bronze and purple.


Tuesday, June 4, 2013

Ideas, Transformations and Getting the Most From One Item


I have been asked how I come up with ideas for the ornaments I create.  A lot of them are inspired by jewelry and some from architectural features, less from nature.  However, what I see and what the ornament looks like when finished may look totally different.  For the most part, differences in appearance can come from the supplies I have to work with.  Many of the findings I use are purchased on the wholesale level.  Buying by the gross (144 items), it can take several months, if not years, to use all of them.  While bulk buying works great for parts I will use in many of the ornaments such as the small 3mm gold-plated metal beads, various sizes and shapes of pearls, and the 2-inch head-pins.  Bulk buying of others just leaves me with lots of parts that I have to store.  I have bought certain components in the past because they were on sale.  The perforated disks, round and teardrop earring components being three.  There were several months (if not years) between purchase and usage, but once I started using them the ideas would keep coming.  An idea may be sparked just by turning the item from vertical to horizontal or rotating it 90 or 180 degrees.  For the perforated disks I had thought to use them as medallions for the tree.  I had seen several disks used in brooches, and had even bought several at yard sales or in bargain bins, but didn’t think of using them as tassel armatures until I casually tossed one of the brooches onto my workspace and it landed on some fringe.

I was placing an order with one of the companies I use, when the customer service operator asked if I would like to hear about their specials.  I agreed and she told me about some round and teardrop shaped parts for earrings.  The earring components were purchased and sat until I could figure out how to keep the chains and focal components separated.  One day I realized you could use any bead as a spacer bead and reached for my Delicas®.  I went through and added all the faceted beads I wanted, added the number of chain segments I wanted, and then added the Delicas® to fill the earring.  Once I knew how many Delicas® I needed, I could evenly space them out.  Since I wished the ornaments to be symmetrical, I started with the bottom-most chain and started dividing the beads between the 2 sides.  I use this technique in many of my ornaments where I have a determined length of wire.  I will start with the segment and ‘string’ the components I want on, them fill the wire segment with the spacer beads.  Many times, I will use 2 colors of spacers alternating every 5 or 10 beads for ease in counting.


 I designed these two from the earring hoops for a program at the Greensboro Gem & Mineral Club.  Jewelry and beading were also included in the clubs programs and I was asked to teach a program on Christmas ornaments.


Other times, I will focus on one of the findings I use, such as a bead-cap, and try to think different ways I can use the part.  I originally purchased one finding for use in a beaded tassel, then I needed a central bead while forming a traditional chandelier shape, so I use the bead-cap in the original shape and then flattened out.  Later I needed something to cover the ends of some cording and I used the same bead-cap.  Years pass and I use the same bead-cap to serve as a connection point in holding the ends of wire to form the globes.  I also look at the bead-cap flattened out and use to make a snowflake drop.  A year or two pass when I am making a miniature ornament and decide to use the same bead-cap, along with the un-folded aspect of the bead-cap.  Six different ornaments from essentially the same metal finding.

I count both the upholstered ornaments and the globes, both large and small, as one ornament since the major difference is shape of the base form or size.  Just a re-calculation of materials needed.  Whereas when looking at the ornaments there are totally different designs.


Thursday, May 30, 2013

"Everyone Deserves a Christmas Tree" or "My Trip Down the Minature Rabbit Hole"

After Thanksgiving several years ago, I was eating at one of my favorite local restaurants in Greensboro, NC, I asked the waiter if he had his tree up yet.  He told me that he did not, and that most likely he wouldn’t due to space and the time putting up and then having to take down the tree.  As I drove home, I was bothered and I kept on thinking ‘Everyone deserves a Christmas tree.’

Over the next few days I decided I would make a miniature tree for him, fully lit and decorated so all he had to do was plug the tree in.  I found a 24 inch tree at one of the local craft stores.  The tree have ‘needles’ about 0.50" long and about 50 branches.  I found several packs of battery powered ‘rice’ lights, along with a 35 bulb strand of LED lights, and I started to work.

I took the wrapping from around the bottom and secured the tree base to a 12x12x0.625" piece of plastic cutting board.  Fluffing the tree branches out to give an appearance of a ‘natural’ tree, I started securing the lights to the branches with small pieces of 26 gauge floral wire.  Just like larger trees, it is best to have the lights on when doing this.  The LED lights were a ‘cool white’ with a bluish tint and very bright, so I positioned them along the trunk of the tree.  With the long ‘needles’ and fluffed branches a gentle cool glow would be emitted from the center of the tree.  Next I positioned the battery-powered ‘rice’ lights.  Dividing the tree into quarters, I strung the lights along the branches, wiring them into place, one bulb per branch near the tip.  Each pack of ‘rice’ lights had 20 bulbs so I had a few left over when I reached the longer, lower branches.  The ‘rice’ lights gave off a ‘warm white’ light.


After the tree was lit, I started the ornaments.  I had decided when I started I would want the ornaments to be ‘in scale’ with the tree, so for a 2-foot tree the scale would be 1:4 if most trees are around 8-foot.  Most globes on trees are between 65mm to 80mm (2.5" to 3.25"), so the globe ornaments would need to be between 15mm to 20mm and any ‘fancy’ ornaments no larger than 2" in length.  Many of the ornaments were simple beads on head pins with bead caps and 3mm metal beads on beginning and ending the assembly.  A simple loop at the end and the ornament was done. 


Many of the ‘fancy’ ornaments were created in similar fashion except many did not have the bead caps.  Teardrop glass beads, graduated faceted beads as well as druks (smooth beads) were used to create miniature ornaments to be utilized in filling out the tree.


When I was at the wholesale show earlier that year, I had bought several dozen pair of earrings.  Since I get much of my inspiration from jewelry, I decided to use the dangle earrings as ornaments.


Because of the long needles, I needed the ornaments to be lower than the needles to swing freely.  To remedy this I used small pieces of chain to suspend the ornaments, freeing them from the needles and used ring sized Memory Wire as ornament hooks.

After putting the tree topper on the tree, the total height was 30 inches.  Knowing I didn’t want to have to take the ornaments off the tree to box everything up, I made a box around the tree.  “Gator Foam” are sheets of PVC, and having ‘dumpster dived’ at a friends plastic company I had plenty of scrap, some as large as I needed.  Using Duct tape, I was able to construct a container which could be lifted off over the tree.  I wrapped a piece of the PVC to act as the bottom of the box and using double-sided carpet tape I secured the tree base to the piece of PVC.  I wrapped the rest of the box, made a bow and carefully placed the present in my car for delivery.

With the help of the manager of the restaurant, I was able to turn on the battery powered lights, put the top of the box over the tree and sneak into the restaurant and placed the tree on the waiter’s open table.  When he started lifting the top off, the light started spilling from the gap.  The restaurant was rather dark and the light drew everyone’s attention.  From several tables I heard “oooh”s and “aaaah”s and the waiter was speechless.  When he regained his composer he asked me why I did it, and I simple told him “Everyone deserves a Christmas tree.”  We took the tree over to the bar and plugged in the LED lights and I went back to the table to have a very good meal.  Many of the customers and employees at the restaurant wanted to know where I had bought the tree.  When I told them I had made most of the ornaments, several asked if I could make one for them and how much would I charge them.  Having no idea how much I spent in time and materials, I declined to name a price.

Since then, I have continued to give him a set of new ornaments for the tree each year.  This year I will most likely have to give him a new tree, as all the ornaments are getting very crowded on one tree.  He has told me, he still has the box I made, and keeps the tree inside until November 1st when he pulls out “his” tree and it sat on either the coffee table or dining table.  He will keep the tree out until January 1st when he turns off the lights, puts the box back over the tree and places it back into storage.

Last year, I made two additional miniature trees, one for charity the other for a co-workers wife, and both were well received.  The tree I used (and will continue to use as long as I can) have shorter ‘needles’ with more branches and concrete bases.  To widen the base, I use pint take-out soup containers and fill the base with gluing compound until it covers the base.  Continuing to use a mixture of AC and DC powered lights, I will attach lights with pieces of floral wire.  I have found 50-light strands of AC powered ‘rice’ lights and I will put 4 packs of the 20-light strands of DC-powered lights.  Using the same techniques as before, I make miniature ornaments for the tree.  The trees last year had 130 lights and over 180 miniature ornaments.