April 2013's Theme ornament for one of the exchanges was “Wings”. I had been wanting to do some wraps for branches and this gave me the opportunity to practice. I had picked up a beaded floral twist and a couple of scrapbook butterflies a few months earlier. Both items were in the “reduced for clearance” section of one of the national craft stores. I took the butterflies and using 20 gauge craft wire, fashioned some holders, gluing the bottom of the butterflies to the craft and then securing the wire on the floral stem. I then affixing some “snow” to the floral branch with polycarbonate saw-dust and glitter.
As long as I can remember I have enjoyed decorating the Christmas tree, looking at the ornaments and seeing everyone's tree. In 1976, the high school art class I was in did Christmas ornaments as part of the class work. It stuck hard, and I have enjoyed making them every since.
Monday, June 17, 2013
Thursday, June 13, 2013
Going further down the “Miniature Rabbit Hole”
Several weekends ago, I went to my favorite wholesale show for gem and jewelry. I found several strands of beads which reminded me of some of the beads I used on the miniature trees I made in 2012. If you are trying to make the tree “to scale”, beads make great ornaments. Many of the beads I use are 6mm (1/4") to 20mm (5/8"), which if you are wanting the 2 foot tree to be scaled to an 8 foot tree, then these beads would appear to be 24mm (about 1") to 80mm (3-1/4"). Since I also add at least two additional 3mm beads to almost every miniature ornament, you can add an additional inch to the apparent scaled size.
While glass beads have an inner ‘glow’ or ‘life’ to them, they also have weight. The finishes available to the glass beads are much more vibrant, reflex light and have a wider range. For the most part, a glass bead and a plastic (sometimes known as acrylic) the same size, the glass will weight considerably more. When you will be adding almost 200 ornaments, weight should come into consideration.
Some of the beads I use have larger holes. Solutions to this can be as simple as using a bead cap and additional beads inside to fill the hole. I have several beads which have made great ornaments but the hole was larger than 1mm. I usually use a 3mm beads on the bottom and top of the ornaments and when you have a larger hole the bead will sit down on the 3mm, or even won’t even stop to notice and fall off the headpin. With beads with 1-4 mm holes, on the headpin I will put the traditional 3mm bead, a bead cap, then put on several smaller beads which will slide inside the hole of the larger bead. Using these extra beads take up some of the room in the hole, thereby stabilizing the bead. If the beads are transparent, I have used clear silver lined Delicas®, silver 2.5mm beads, or clear silver line bugle beads. If the beads are hollow like the corrugated metal beads, I use the soft plastic ear nuts at the top and bottom to act as stabilizers and help center the bead on the head pin. I prefer using the ones that look like little hats as I can cut the excess off.
I went browsing through one of the local bead store at the beginning of June and the store had a “bargain bin” of beads that they were trying to clear out. I knew I shouldn’t have browsed, but I did and ended up buying a few packets (13) of beads. Almost everyone of these will be used in making miniature ornaments. Some will be finished just by adding some chain, or maybe a linked gold bead if I can find a gold which matches. The bead shop had more of these beads, and I will most likely be heading back soon to ‘clean them out’ of certain beads. I have found over the years, that if you find a limited quantity, better to buy as many as you can afford, as you will find the next time someone has beat you to it and you will never find them again. This has been learned from experience.
The black and white squares are ½”, ¼” and ⅛”, the entire block is 2" x 3". Most likely the spikes or daggers will be used as icicles, attach a piece of chain and maybe a beaded link for the small spike.
The mesh beads will have a clear earnut inserted into each end and covered with a bead cap. The last time the store also had several different sizes of the mesh beads available in different anodized colors: pink, light blue, dark blue, silver, red, bright green, bronze and purple.
While glass beads have an inner ‘glow’ or ‘life’ to them, they also have weight. The finishes available to the glass beads are much more vibrant, reflex light and have a wider range. For the most part, a glass bead and a plastic (sometimes known as acrylic) the same size, the glass will weight considerably more. When you will be adding almost 200 ornaments, weight should come into consideration.
Some of the beads I use have larger holes. Solutions to this can be as simple as using a bead cap and additional beads inside to fill the hole. I have several beads which have made great ornaments but the hole was larger than 1mm. I usually use a 3mm beads on the bottom and top of the ornaments and when you have a larger hole the bead will sit down on the 3mm, or even won’t even stop to notice and fall off the headpin. With beads with 1-4 mm holes, on the headpin I will put the traditional 3mm bead, a bead cap, then put on several smaller beads which will slide inside the hole of the larger bead. Using these extra beads take up some of the room in the hole, thereby stabilizing the bead. If the beads are transparent, I have used clear silver lined Delicas®, silver 2.5mm beads, or clear silver line bugle beads. If the beads are hollow like the corrugated metal beads, I use the soft plastic ear nuts at the top and bottom to act as stabilizers and help center the bead on the head pin. I prefer using the ones that look like little hats as I can cut the excess off.
I went browsing through one of the local bead store at the beginning of June and the store had a “bargain bin” of beads that they were trying to clear out. I knew I shouldn’t have browsed, but I did and ended up buying a few packets (13) of beads. Almost everyone of these will be used in making miniature ornaments. Some will be finished just by adding some chain, or maybe a linked gold bead if I can find a gold which matches. The bead shop had more of these beads, and I will most likely be heading back soon to ‘clean them out’ of certain beads. I have found over the years, that if you find a limited quantity, better to buy as many as you can afford, as you will find the next time someone has beat you to it and you will never find them again. This has been learned from experience.
The mesh beads will have a clear earnut inserted into each end and covered with a bead cap. The last time the store also had several different sizes of the mesh beads available in different anodized colors: pink, light blue, dark blue, silver, red, bright green, bronze and purple.
Monday, June 10, 2013
Producing new from a mixture of old and new
A
couple of years ago, one of the exchange groups I was a member of had a
“theme” of “Victorian” for that month’s exchange. I was looking
through a couple of reference books and the two ornaments I came up with
were:


Using chenille stems, vintage glass beads, faux pearls, some wire and pressed Czech glass beads, I designed these. Since then I have formed additional images and will most likely continue creating ornaments along a similar vein. I had several strands of vintage garland that had several broken beads in them so I decided to cut the strands and use individual beads. Since then I have found more strands of re-produced garlands incorporating additional colors, as well as finding a few new designs.
One of the problems I encountered was the tensile strength of the chenille stems. Casual brushing against the ornament resulted in deforming. As the white and gold illustrates, even the hanging to photograph resulted in the arms becoming mis-aligned. Each time I have exhibited these, tweaking of the stem was necessary. But the ornaments made during the late 1800s most likely suffered the same problems..


Using chenille stems, vintage glass beads, faux pearls, some wire and pressed Czech glass beads, I designed these. Since then I have formed additional images and will most likely continue creating ornaments along a similar vein. I had several strands of vintage garland that had several broken beads in them so I decided to cut the strands and use individual beads. Since then I have found more strands of re-produced garlands incorporating additional colors, as well as finding a few new designs.
One of the problems I encountered was the tensile strength of the chenille stems. Casual brushing against the ornament resulted in deforming. As the white and gold illustrates, even the hanging to photograph resulted in the arms becoming mis-aligned. Each time I have exhibited these, tweaking of the stem was necessary. But the ornaments made during the late 1800s most likely suffered the same problems..
Tuesday, June 4, 2013
Ideas, Transformations and Getting the Most From One Item
I was placing an order with one of the companies I use, when the customer service operator asked if I would like to hear about their specials. I agreed and she told me about some round and teardrop shaped parts for earrings. The earring components were purchased and sat until I could figure out how to keep the chains and focal components separated. One day I realized you could use any bead as a spacer bead and reached for my Delicas®. I went through and added all the faceted beads I wanted, added the number of chain segments I wanted, and then added the Delicas® to fill the earring. Once I knew how many Delicas® I needed, I could evenly space them out. Since I wished the ornaments to be symmetrical, I started with the bottom-most chain and started dividing the beads between the 2 sides. I use this technique in many of my ornaments where I have a determined length of wire. I will start with the segment and ‘string’ the components I want on, them fill the wire segment with the spacer beads. Many times, I will use 2 colors of spacers alternating every 5 or 10 beads for ease in counting.
I designed these two from the earring hoops for a program at the Greensboro Gem & Mineral Club. Jewelry and beading were also included in the clubs programs and I was asked to teach a program on Christmas ornaments.
Other times, I will focus on one of the findings I use, such as a bead-cap, and try to think different ways I can use the part. I originally purchased one finding for use in a beaded tassel, then I needed a central bead while forming a traditional chandelier shape, so I use the bead-cap in the original shape and then flattened out. Later I needed something to cover the ends of some cording and I used the same bead-cap. Years pass and I use the same bead-cap to serve as a connection point in holding the ends of wire to form the globes. I also look at the bead-cap flattened out and use to make a snowflake drop. A year or two pass when I am making a miniature ornament and decide to use the same bead-cap, along with the un-folded aspect of the bead-cap. Six different ornaments from essentially the same metal finding.
I count both the upholstered ornaments and the globes, both large and small, as one ornament since the major difference is shape of the base form or size. Just a re-calculation of materials needed. Whereas when looking at the ornaments there are totally different designs.
Thursday, May 30, 2013
"Everyone Deserves a Christmas Tree" or "My Trip Down the Minature Rabbit Hole"
After Thanksgiving several years ago, I was eating at one of my favorite local restaurants in Greensboro, NC, I asked the waiter if he had his tree up yet. He told me that he did not, and that most likely he wouldn’t due to space and the time putting up and then having to take down the tree. As I drove home, I was bothered and I kept on thinking ‘Everyone deserves a Christmas tree.’
Over the next few days I decided I would make a miniature tree for him, fully lit and decorated so all he had to do was plug the tree in. I found a 24 inch tree at one of the local craft stores. The tree have ‘needles’ about 0.50" long and about 50 branches. I found several packs of battery powered ‘rice’ lights, along with a 35 bulb strand of LED lights, and I started to work.
I took the wrapping from around the bottom and secured the tree base to a 12x12x0.625" piece of plastic cutting board. Fluffing the tree branches out to give an appearance of a ‘natural’ tree, I started securing the lights to the branches with small pieces of 26 gauge floral wire. Just like larger trees, it is best to have the lights on when doing this. The LED lights were a ‘cool white’ with a bluish tint and very bright, so I positioned them along the trunk of the tree. With the long ‘needles’ and fluffed branches a gentle cool glow would be emitted from the center of the tree. Next I positioned the battery-powered ‘rice’ lights. Dividing the tree into quarters, I strung the lights along the branches, wiring them into place, one bulb per branch near the tip. Each pack of ‘rice’ lights had 20 bulbs so I had a few left over when I reached the longer, lower branches. The ‘rice’ lights gave off a ‘warm white’ light.
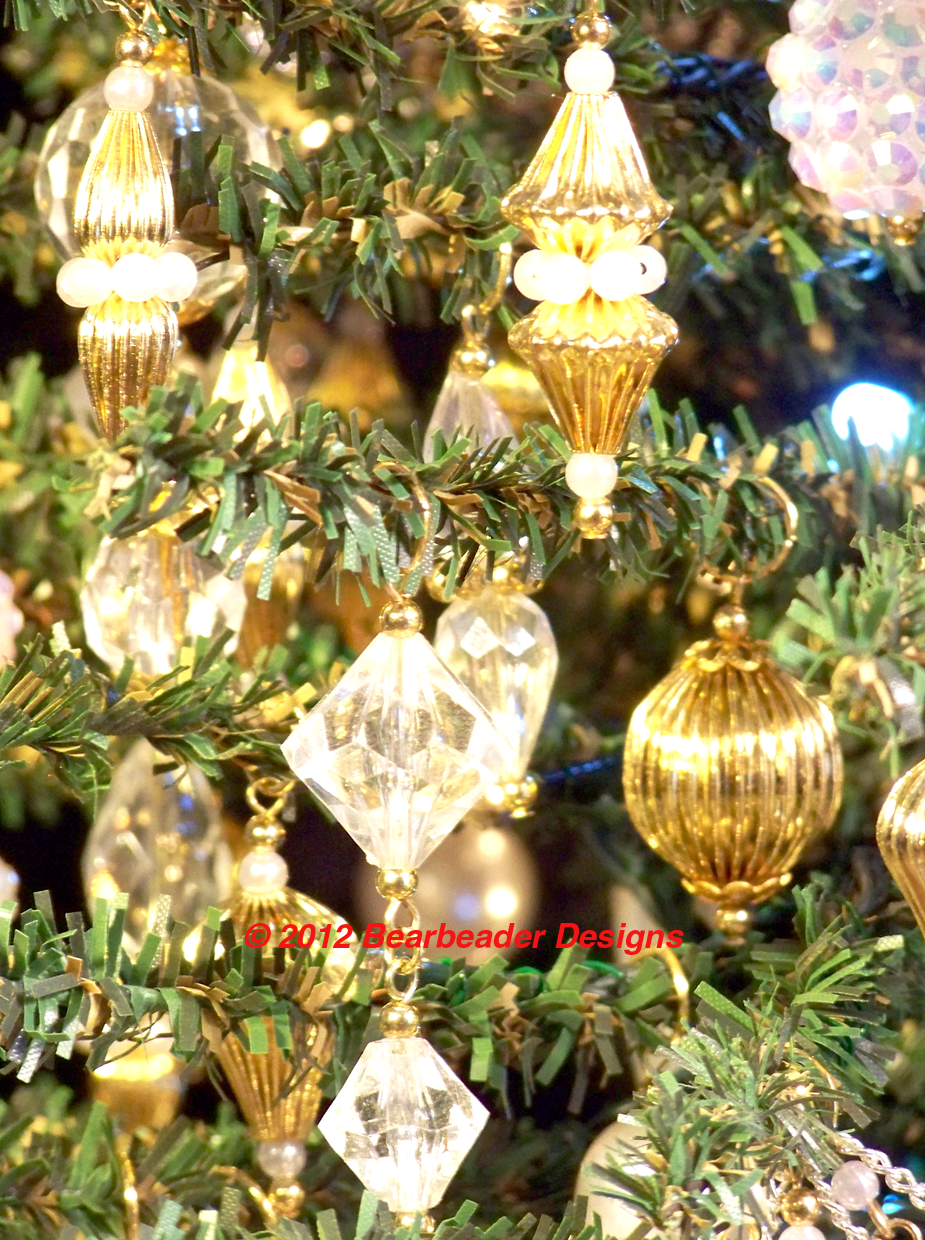
After the tree was lit, I started the ornaments. I had decided when I started I would want the ornaments to be ‘in scale’ with the tree, so for a 2-foot tree the scale would be 1:4 if most trees are around 8-foot. Most globes on trees are between 65mm to 80mm (2.5" to 3.25"), so the globe ornaments would need to be between 15mm to 20mm and any ‘fancy’ ornaments no larger than 2" in length. Many of the ornaments were simple beads on head pins with bead caps and 3mm metal beads on beginning and ending the assembly. A simple loop at the end and the ornament was done.


Many of the ‘fancy’ ornaments were created in similar fashion except many did not have the bead caps. Teardrop glass beads, graduated faceted beads as well as druks (smooth beads) were used to create miniature ornaments to be utilized in filling out the tree.

When I was at the wholesale show earlier that year, I had bought several dozen pair of earrings. Since I get much of my inspiration from jewelry, I decided to use the dangle earrings as ornaments.
Because of the long needles, I needed the ornaments to be lower than the needles to swing freely. To remedy this I used small pieces of chain to suspend the ornaments, freeing them from the needles and used ring sized Memory Wire as ornament hooks.
After putting the tree topper on the tree, the total height was 30 inches. Knowing I didn’t want to have to take the ornaments off the tree to box everything up, I made a box around the tree. “Gator Foam” are sheets of PVC, and having ‘dumpster dived’ at a friends plastic company I had plenty of scrap, some as large as I needed. Using Duct tape, I was able to construct a container which could be lifted off over the tree. I wrapped a piece of the PVC to act as the bottom of the box and using double-sided carpet tape I secured the tree base to the piece of PVC. I wrapped the rest of the box, made a bow and carefully placed the present in my car for delivery.
With the help of the manager of the restaurant, I was able to turn on the battery powered lights, put the top of the box over the tree and sneak into the restaurant and placed the tree on the waiter’s open table. When he started lifting the top off, the light started spilling from the gap. The restaurant was rather dark and the light drew everyone’s attention. From several tables I heard “oooh”s and “aaaah”s and the waiter was speechless. When he regained his composer he asked me why I did it, and I simple told him “Everyone deserves a Christmas tree.” We took the tree over to the bar and plugged in the LED lights and I went back to the table to have a very good meal. Many of the customers and employees at the restaurant wanted to know where I had bought the tree. When I told them I had made most of the ornaments, several asked if I could make one for them and how much would I charge them. Having no idea how much I spent in time and materials, I declined to name a price.
Since then, I have continued to give him a set of new ornaments for the tree each year. This year I will most likely have to give him a new tree, as all the ornaments are getting very crowded on one tree. He has told me, he still has the box I made, and keeps the tree inside until November 1st when he pulls out “his” tree and it sat on either the coffee table or dining table. He will keep the tree out until January 1st when he turns off the lights, puts the box back over the tree and places it back into storage.
Last year, I made two additional miniature trees, one for charity the other for a co-workers wife, and both were well received. The tree I used (and will continue to use as long as I can) have shorter ‘needles’ with more branches and concrete bases. To widen the base, I use pint take-out soup containers and fill the base with gluing compound until it covers the base. Continuing to use a mixture of AC and DC powered lights, I will attach lights with pieces of floral wire. I have found 50-light strands of AC powered ‘rice’ lights and I will put 4 packs of the 20-light strands of DC-powered lights. Using the same techniques as before, I make miniature ornaments for the tree. The trees last year had 130 lights and over 180 miniature ornaments.

Over the next few days I decided I would make a miniature tree for him, fully lit and decorated so all he had to do was plug the tree in. I found a 24 inch tree at one of the local craft stores. The tree have ‘needles’ about 0.50" long and about 50 branches. I found several packs of battery powered ‘rice’ lights, along with a 35 bulb strand of LED lights, and I started to work.
I took the wrapping from around the bottom and secured the tree base to a 12x12x0.625" piece of plastic cutting board. Fluffing the tree branches out to give an appearance of a ‘natural’ tree, I started securing the lights to the branches with small pieces of 26 gauge floral wire. Just like larger trees, it is best to have the lights on when doing this. The LED lights were a ‘cool white’ with a bluish tint and very bright, so I positioned them along the trunk of the tree. With the long ‘needles’ and fluffed branches a gentle cool glow would be emitted from the center of the tree. Next I positioned the battery-powered ‘rice’ lights. Dividing the tree into quarters, I strung the lights along the branches, wiring them into place, one bulb per branch near the tip. Each pack of ‘rice’ lights had 20 bulbs so I had a few left over when I reached the longer, lower branches. The ‘rice’ lights gave off a ‘warm white’ light.
After the tree was lit, I started the ornaments. I had decided when I started I would want the ornaments to be ‘in scale’ with the tree, so for a 2-foot tree the scale would be 1:4 if most trees are around 8-foot. Most globes on trees are between 65mm to 80mm (2.5" to 3.25"), so the globe ornaments would need to be between 15mm to 20mm and any ‘fancy’ ornaments no larger than 2" in length. Many of the ornaments were simple beads on head pins with bead caps and 3mm metal beads on beginning and ending the assembly. A simple loop at the end and the ornament was done.


Many of the ‘fancy’ ornaments were created in similar fashion except many did not have the bead caps. Teardrop glass beads, graduated faceted beads as well as druks (smooth beads) were used to create miniature ornaments to be utilized in filling out the tree.

When I was at the wholesale show earlier that year, I had bought several dozen pair of earrings. Since I get much of my inspiration from jewelry, I decided to use the dangle earrings as ornaments.
Because of the long needles, I needed the ornaments to be lower than the needles to swing freely. To remedy this I used small pieces of chain to suspend the ornaments, freeing them from the needles and used ring sized Memory Wire as ornament hooks.
After putting the tree topper on the tree, the total height was 30 inches. Knowing I didn’t want to have to take the ornaments off the tree to box everything up, I made a box around the tree. “Gator Foam” are sheets of PVC, and having ‘dumpster dived’ at a friends plastic company I had plenty of scrap, some as large as I needed. Using Duct tape, I was able to construct a container which could be lifted off over the tree. I wrapped a piece of the PVC to act as the bottom of the box and using double-sided carpet tape I secured the tree base to the piece of PVC. I wrapped the rest of the box, made a bow and carefully placed the present in my car for delivery.
With the help of the manager of the restaurant, I was able to turn on the battery powered lights, put the top of the box over the tree and sneak into the restaurant and placed the tree on the waiter’s open table. When he started lifting the top off, the light started spilling from the gap. The restaurant was rather dark and the light drew everyone’s attention. From several tables I heard “oooh”s and “aaaah”s and the waiter was speechless. When he regained his composer he asked me why I did it, and I simple told him “Everyone deserves a Christmas tree.” We took the tree over to the bar and plugged in the LED lights and I went back to the table to have a very good meal. Many of the customers and employees at the restaurant wanted to know where I had bought the tree. When I told them I had made most of the ornaments, several asked if I could make one for them and how much would I charge them. Having no idea how much I spent in time and materials, I declined to name a price.
Since then, I have continued to give him a set of new ornaments for the tree each year. This year I will most likely have to give him a new tree, as all the ornaments are getting very crowded on one tree. He has told me, he still has the box I made, and keeps the tree inside until November 1st when he pulls out “his” tree and it sat on either the coffee table or dining table. He will keep the tree out until January 1st when he turns off the lights, puts the box back over the tree and places it back into storage.
Last year, I made two additional miniature trees, one for charity the other for a co-workers wife, and both were well received. The tree I used (and will continue to use as long as I can) have shorter ‘needles’ with more branches and concrete bases. To widen the base, I use pint take-out soup containers and fill the base with gluing compound until it covers the base. Continuing to use a mixture of AC and DC powered lights, I will attach lights with pieces of floral wire. I have found 50-light strands of AC powered ‘rice’ lights and I will put 4 packs of the 20-light strands of DC-powered lights. Using the same techniques as before, I make miniature ornaments for the tree. The trees last year had 130 lights and over 180 miniature ornaments.

Wednesday, May 29, 2013
Looking at Globes
Going
through past images of my ornaments, I have noticed trends. Starting
off in 1976 with gold-foiled kraft paper to make 3-Dimensional Platonic
solids and using colored glue, cellophane cling wrap, liquid leading and pages of coloring books to make glass clingers, then ‘graduating’
to beads and the other media, most of my ornaments take unusual twists.
If you ask most people about Christmas ornaments many will answer with
the ubiquitous ball or globe shaped ornament. Easily remembered, but
always easily forgotten. Boxes of the globe ornaments are sold each
year in a wide range of colors, finishes and sizes. They make great
‘filler’ ornaments that people expect to see on the decorated tree. I,
like most, have boxes upon boxes of the ornaments in different sizes,
colors, and finishes.
Back when I was studying at Florida State University in the late 1980s, I began constructing embellishments to the globe ornaments. The first was making custom globes for friends by pouring latex paint into the globe, swirling around, and then letting drain over night. This can be a great “First Christmas in a new house” gift, making ornaments using the colors of the rooms in the house. Depending on the finish of the clear glass globes you can make frosted, ‘AB’ or aurora borealis or shiny using the reflectiveness of the plain clear glass ones.
Doesn’t take long after gathering your supplies. You will need some type of work place covering - old sheet, newspaper, etc., either some denatured alcohol or vinegar (a bit smelly but a good cleaner which leaves little residue), drainage cups - I usually use the small Dixie cups used in the bathroom, you paint and the glass globes. Remove the ornament cap by gently pulling the hanger up and sitting them aside. I always clean the inside of the ornament by pouring a little denatured alcohol into the ornament and swirling the alcohol around and turning the ornament upside to allow for drainage. Because of the low ‘flash’ point of alcohol much will evaporate just from the heat of your hand. I would clean the ornaments one evening and the next would coat the insides. There are several different techniques to inject the paint inside the ornament. If you are using the small bottles of Tole paint, you can just squirt the paint from the bottle. You can also use small plastic bottles for cake decorating or carefully pour the paint inside with a paper cone. You don’t need much for a 65mm glass globe. I would give a ‘good squirt’ and fill the bottom maybe 0.50 inch. I would start tilting and rotating the globe slowly moving the top of the ornament to the bottom.
As the paint completely covers the inside of the ornament, turn the ornament upside to drain into the disposable cups. Allow to drain overnight. When drained, I keep the cups for the next batch, replace the ornament caps and take a soft lint free cloth moistened with either the alcohol or vinegar and wipe down the outside of the ornaments removing fingerprints. Depending on the weight of the paint, you may want to glue the cap onto the ornaments, I traditionally use E-6000 or 572 epoxy.
I have also used spray paint to coat the inside of glass globes. I would suggest doing this outside, wearing disposable gloves. Align the nozzle tip and place next to the ornament opening. Depress nozzle and let the paint spray into the ornament. Shake the ornament and rotate until the insides are evenly coated. Again turn upside to drain.
Another embellishment to the common globe would be what I call “Ball Gowns”. I have collected several books on tatting, crocheting, bead-working and macraméing coverings for globes. It seems every few months, a new book of designs comes out, or a new design is featured in magazines. Here is one of mine I did in the late 1980s.

The Summer of 2006, I attended a wholesale gem and jewelry show where I purchase several gross of simple costume jewelry necklaces. I had no idea what I would do with them be the price was great. On the 5 hours ride back, I knew I would end up turning them into ball gowns.

After attending the 2009 show, I came back with several pair of earrings which have ended up as focal components of more ball gowns. Using plain curb chain, jump rings, and the earrings I constructed more ball gowns.

In the beginning of 2012, one of my ornament exchange groups had a theme of “Recycled”. The ornament I made were from recycled parts from where I work. I used tube caps to strengthen the neck of the large globes and add more area for epoxy to glue the small globe. To hide the connection point, I used scrap fibreglass and flannel to make a scarf.
Back when I was studying at Florida State University in the late 1980s, I began constructing embellishments to the globe ornaments. The first was making custom globes for friends by pouring latex paint into the globe, swirling around, and then letting drain over night. This can be a great “First Christmas in a new house” gift, making ornaments using the colors of the rooms in the house. Depending on the finish of the clear glass globes you can make frosted, ‘AB’ or aurora borealis or shiny using the reflectiveness of the plain clear glass ones.
Doesn’t take long after gathering your supplies. You will need some type of work place covering - old sheet, newspaper, etc., either some denatured alcohol or vinegar (a bit smelly but a good cleaner which leaves little residue), drainage cups - I usually use the small Dixie cups used in the bathroom, you paint and the glass globes. Remove the ornament cap by gently pulling the hanger up and sitting them aside. I always clean the inside of the ornament by pouring a little denatured alcohol into the ornament and swirling the alcohol around and turning the ornament upside to allow for drainage. Because of the low ‘flash’ point of alcohol much will evaporate just from the heat of your hand. I would clean the ornaments one evening and the next would coat the insides. There are several different techniques to inject the paint inside the ornament. If you are using the small bottles of Tole paint, you can just squirt the paint from the bottle. You can also use small plastic bottles for cake decorating or carefully pour the paint inside with a paper cone. You don’t need much for a 65mm glass globe. I would give a ‘good squirt’ and fill the bottom maybe 0.50 inch. I would start tilting and rotating the globe slowly moving the top of the ornament to the bottom.
As the paint completely covers the inside of the ornament, turn the ornament upside to drain into the disposable cups. Allow to drain overnight. When drained, I keep the cups for the next batch, replace the ornament caps and take a soft lint free cloth moistened with either the alcohol or vinegar and wipe down the outside of the ornaments removing fingerprints. Depending on the weight of the paint, you may want to glue the cap onto the ornaments, I traditionally use E-6000 or 572 epoxy.
I have also used spray paint to coat the inside of glass globes. I would suggest doing this outside, wearing disposable gloves. Align the nozzle tip and place next to the ornament opening. Depress nozzle and let the paint spray into the ornament. Shake the ornament and rotate until the insides are evenly coated. Again turn upside to drain.
Another embellishment to the common globe would be what I call “Ball Gowns”. I have collected several books on tatting, crocheting, bead-working and macraméing coverings for globes. It seems every few months, a new book of designs comes out, or a new design is featured in magazines. Here is one of mine I did in the late 1980s.

The Summer of 2006, I attended a wholesale gem and jewelry show where I purchase several gross of simple costume jewelry necklaces. I had no idea what I would do with them be the price was great. On the 5 hours ride back, I knew I would end up turning them into ball gowns.

After attending the 2009 show, I came back with several pair of earrings which have ended up as focal components of more ball gowns. Using plain curb chain, jump rings, and the earrings I constructed more ball gowns.

In the beginning of 2012, one of my ornament exchange groups had a theme of “Recycled”. The ornament I made were from recycled parts from where I work. I used tube caps to strengthen the neck of the large globes and add more area for epoxy to glue the small globe. To hide the connection point, I used scrap fibreglass and flannel to make a scarf.
Sunday, May 26, 2013
More ornaments
I used an aluminum welding wire as the thread and threaded graduated pearls, starting with the largest 18mm pearls. Thread both ends of wire through the hole and pull until most of the wire is through. Insert a pair of needle nose pliers into the loop and pull tight to form the loop. Take one of the wire and bend at a 90 degree angle to form the hanger. On the other wire, thread the remaining pearls in sets of three until you thread 3 - 4mm. Bend the wire into an arc, and using wire flush cutters, cut leaving about 3/8 of an inch. Using loop pliers (or needle nose), create another loop to hold the pearls secure as well as a place to secure a pearl teardrop. Attach a pearl teardrop at other loop. To Create Hanger: Straighten curl from wire, then make a bend to off set the ornament. Create another loop and some chain to suspend from tree.
Another ornament which I created for an ornament exchange is the “fuzzy chandelier”. The theme for this exchange was “Fuzzy” and this is the ornament created back in 2009. I decided to add some additional embellishments with swags of gold chain and beaded dangles.
The last ornaments are all out beaded. Back in the late 1990s, I placed an order for some beading materials and the telephone operator asked if I would be interested in hearing about their specials, of course I said “Yes”. One of the special were perforated disks, I bought a couple packages not knowing what I would do with them but figured I would think of something. I ended up using them in these tassels. Each perforated disk has 91 holes. I used several different lengths of needles to make the fringe in ring the same length. I would do the bottom disk with fringe and then bead the top disk with loops of beads. After completing the two disk I would sew them together and then create the beaded hangers for them. These could be made in a wide variety of color combinations.
The first tassel was made as a Christmas present for my adopted brother. The beads were pre-WWI Czech with gold-line square holes with an Aurora Borealis (or AB) finish. When finished the ornament looked like solid champagne.
The gold and green tassel was the first ornament I ever sold. The price was $75. My mother saw the price tag I had on it and she told me no one would pay that much for a Christmas ornament. I hadn’t even finished setting up my vending table and someone purchased it. They didn’t bat an eye at the cost.
Subscribe to:
Posts (Atom)